
DIY Wooden Easter Eggs
It's that time of year! Time to get out the dye and color some eggs, right?! You may have already done this or will this weekend. It's such a fun tradition for some many of you out there. I grew up coloring eggs, too. Now that I'm a mom, I want to carry on these same traditions for our kiddos to enjoy!
After stumbling across some wooden eggs recently, I decided to try something that would last a little longer so I could use it as decor year after year. (These ones I painted, next year I'd love for boys to paint their own and add to my collection!) They turned out kinda cute so I wanted to share the "How To" with you!
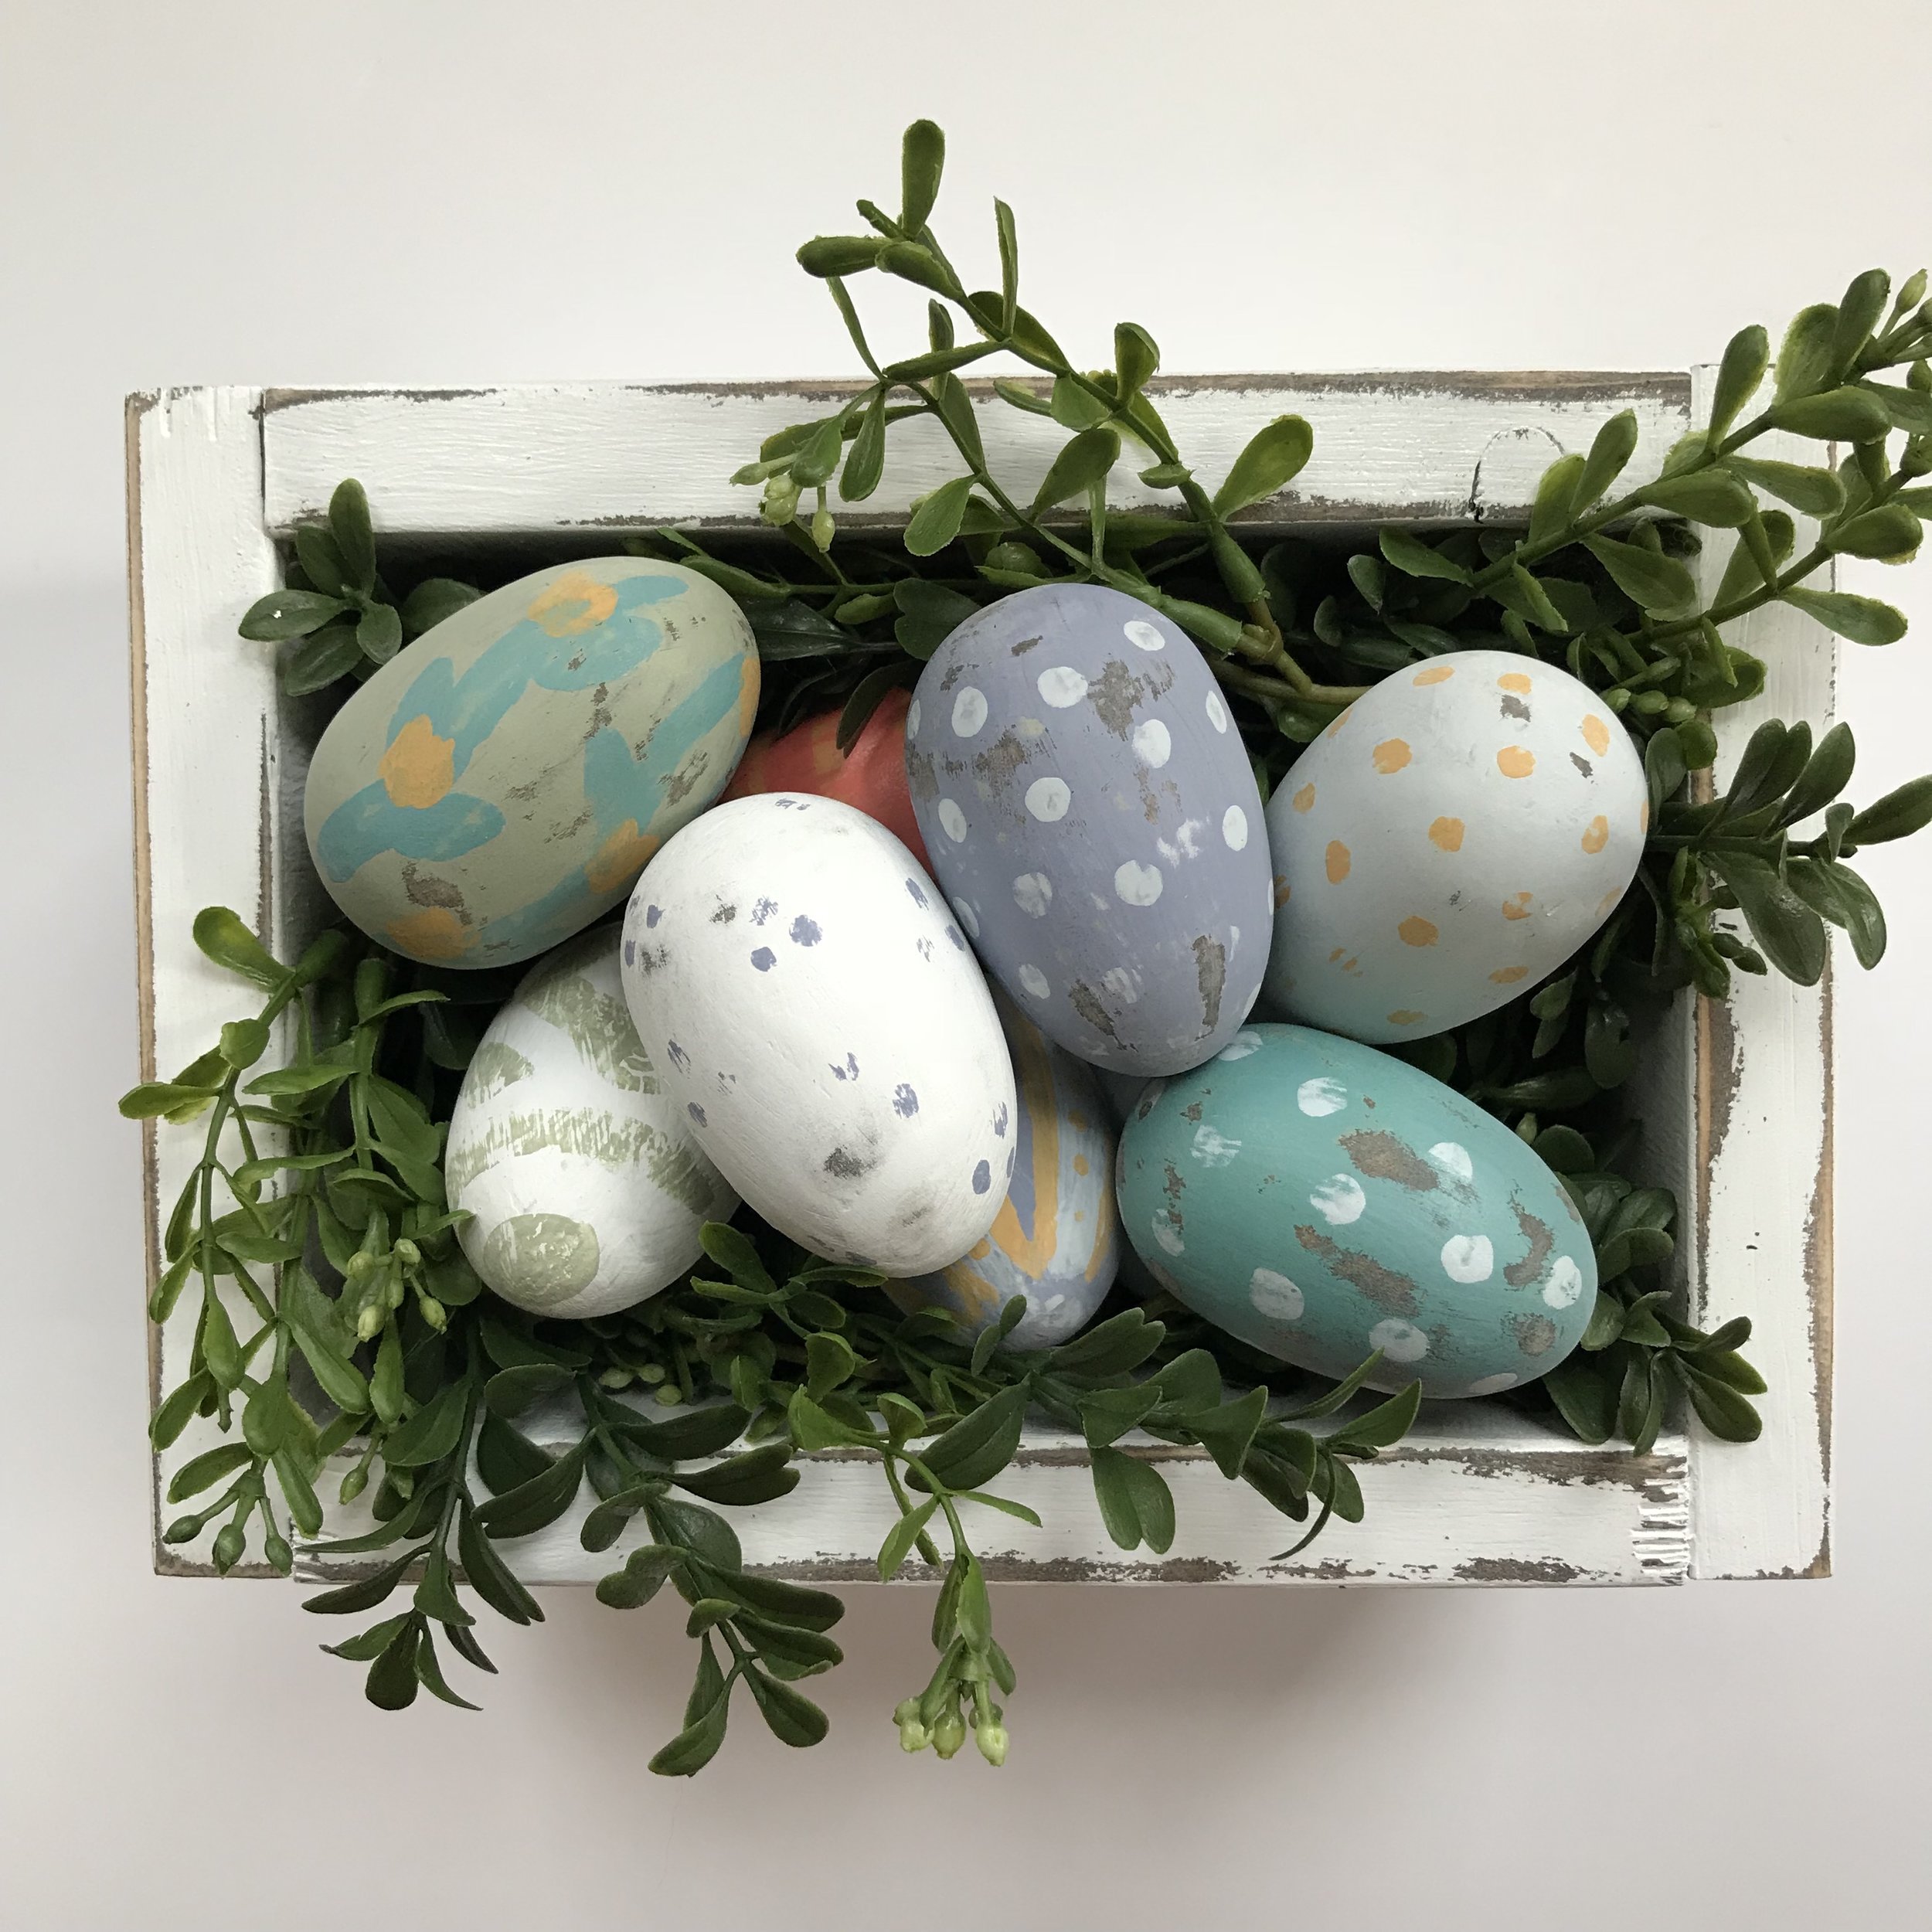
Farmhouse Caddy stuffed with greenery and painted eggs
Ready to get your DIY on? Here's what you will need:
Wooden eggs
Stain (optional)
Paint (chalk or acyrlic)
Paint Brushes
Sand paper (lower grit, 120 is what I used)
Polyacrylic spray
THE EGGS I found the wooden eggs at our local craft supply store, Pat Catan's. You can probably find wooden eggs right now at your local store, but if not they have Darice and other brands on Amazon. (The 12 pack that I bought in-store was cheaper than what they are listed on Amazon for.)

THE STAIN Next you can stain! Personally, I use Dark Walnut as a base for projects when I know I will be distressing them. (NOTE: If you don't plan on distressing them then you could skip this step.) To stain, make sure you have a set gloves, a rag or a piece of an old, but clean t-shirt and the stain of your choice. Also don't forget to do this part in a well ventilated area that you don't mind making a mess in!

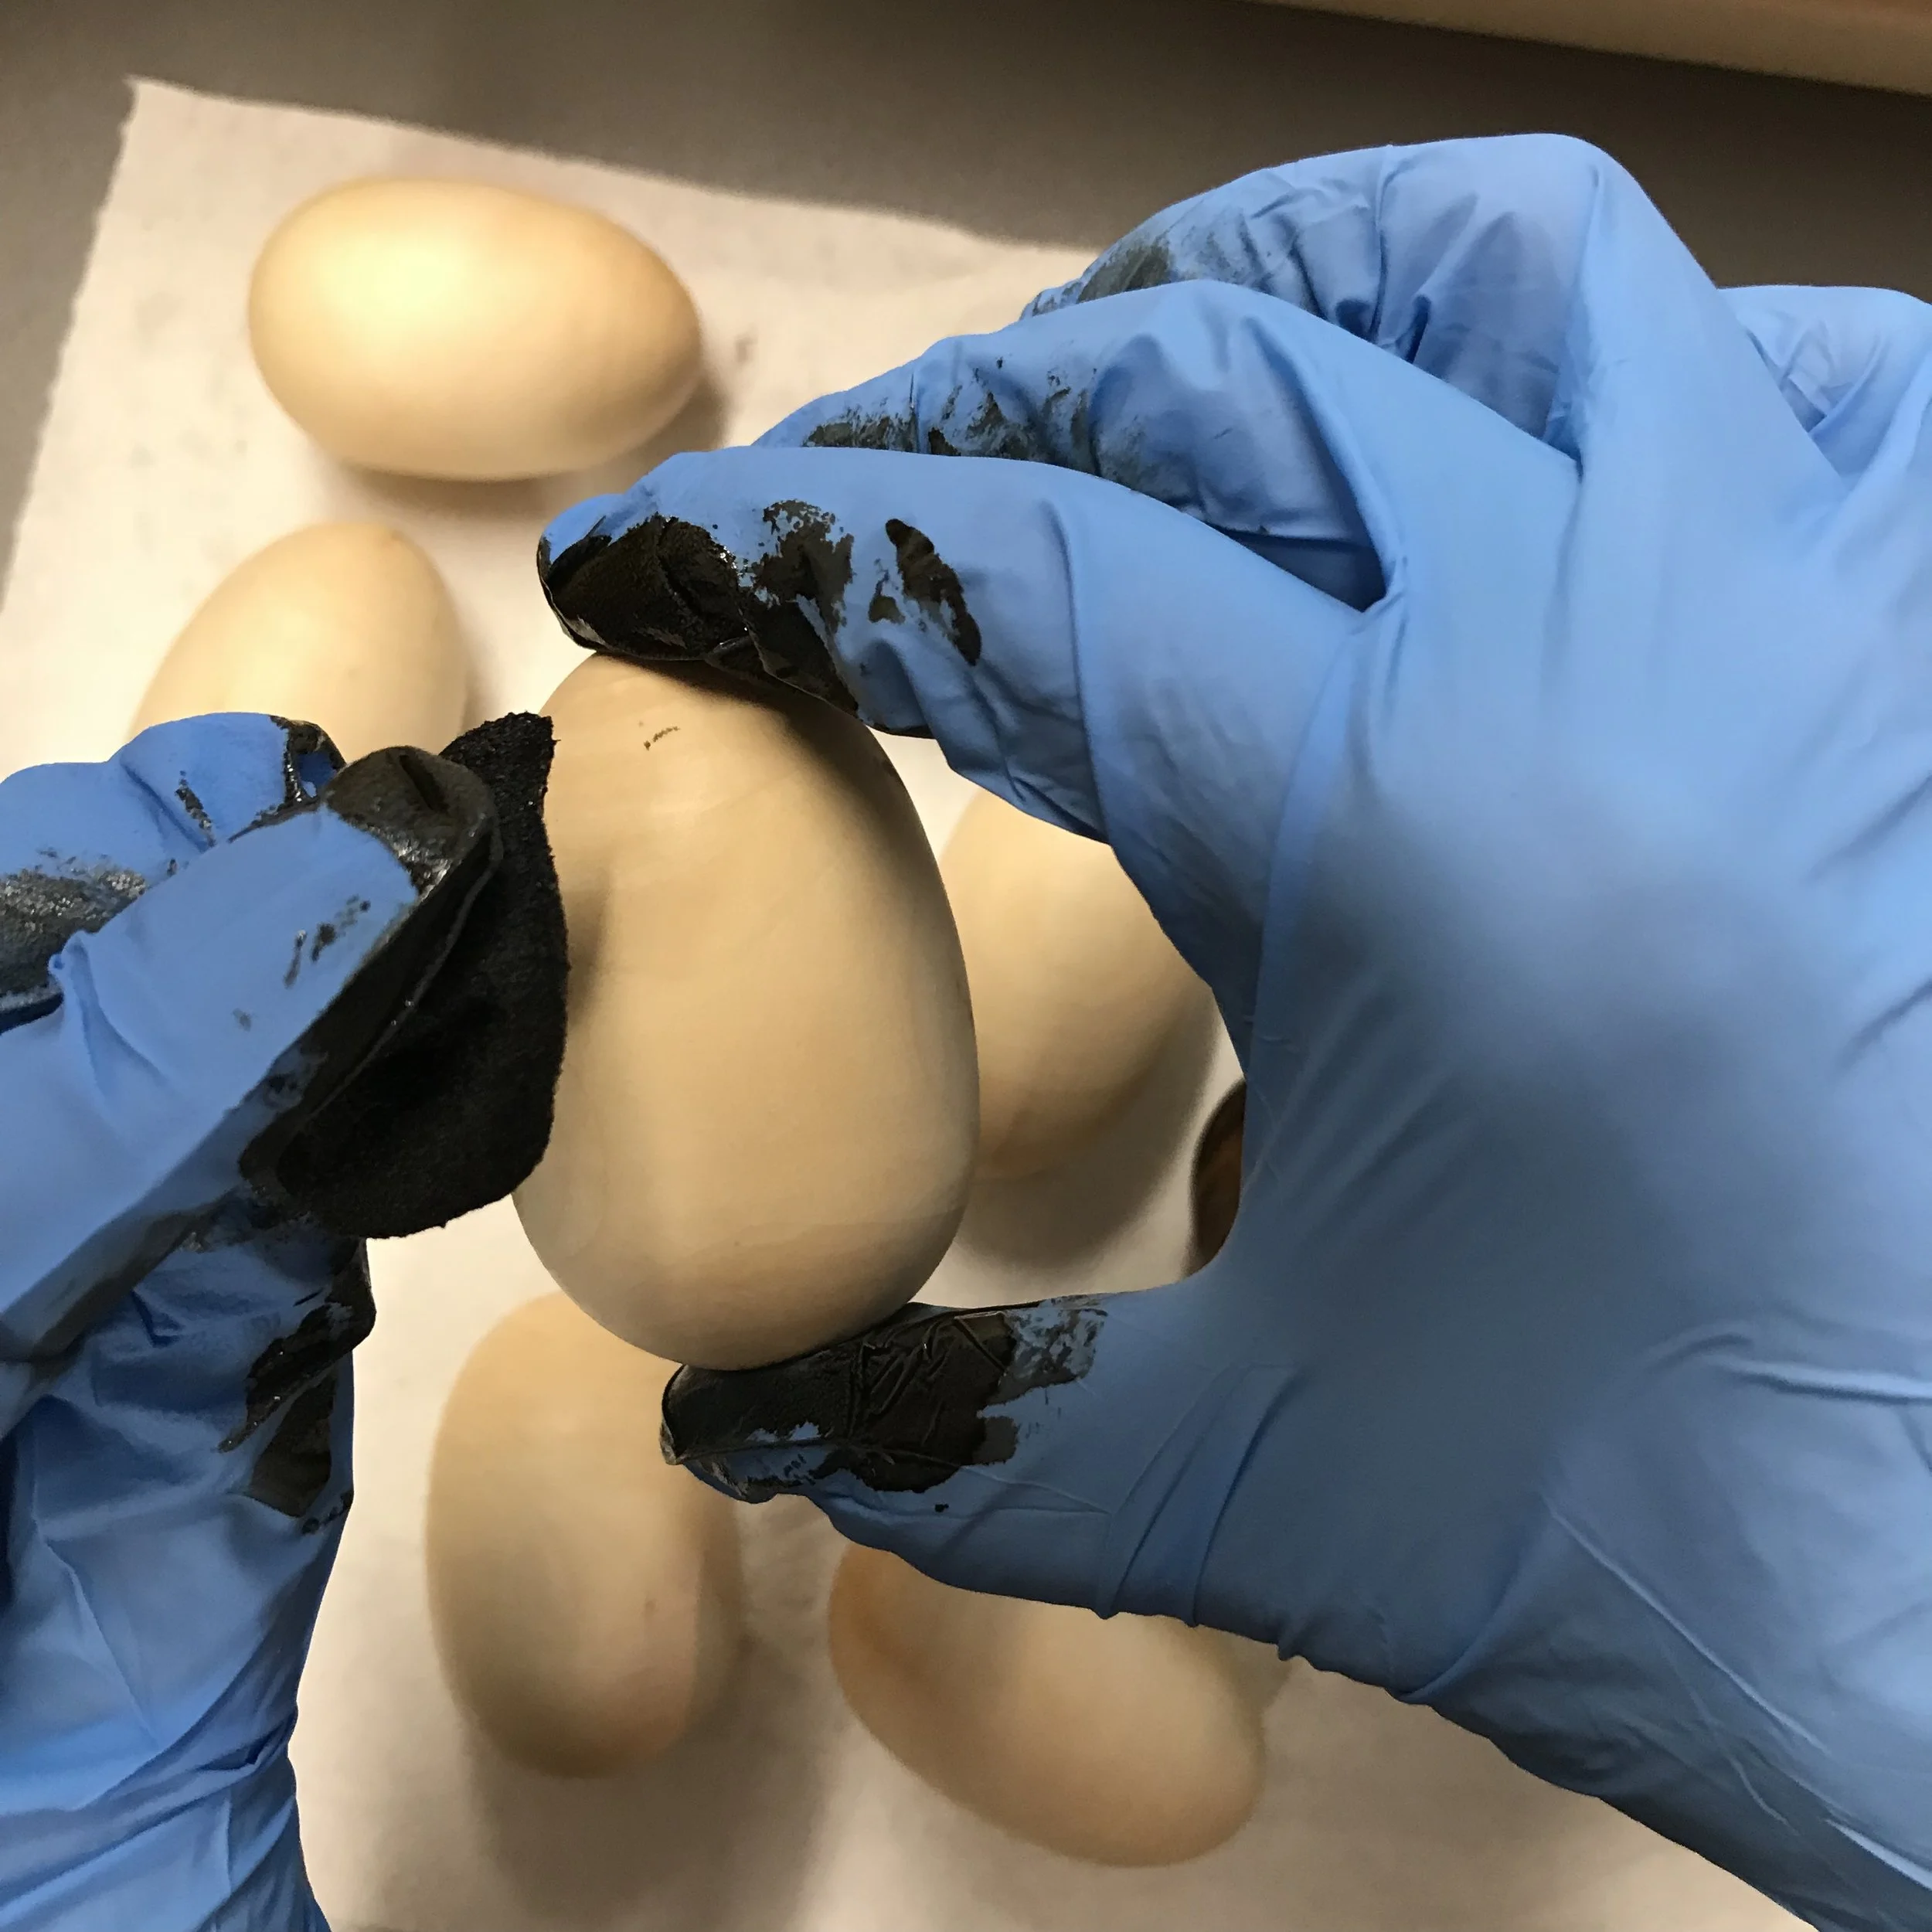

So, that part wasn't my favorite! I had trouble keeping a hold of the egg. I dropped them several times. Luckily, I did this part out in the garage so it was no worries with a mess. (If you give it a try, leave comments below and let me know how it worked for you!) If you're not used to working with stain, here are a couple tips!
1. Stir the can after opening. Even if it's new, there are color particles settled in the bottom. Always stir before using!
2. After you apply the stain with your rag, you can wipe excess stain off with a paper towel. Now if I am honest, I will say I don't always do this but the experts will tell you to...so do that!
3. Let them dry, preferably over night!
Now you are ready to paint! Time to get creative! IMPORTANT NOTE: If you are doing this project with your kids. You may want to paint all the base coats first. Then let them paint all the fun details that their creative little minds imagine!
THE PAINT When it comes to chalk paint, I don't get hung up on brands. I tend to buy the colors I like before thinking about the brand. I generally have Waverly (only sold through Walmart) on hand; the colors are muted but still have great coverage. I ended up painting two coats on the lighter colors because of the stain beneath. The coverage is a bonus because usually one coat will do! You don't have to just use chalk paint though, acrylic works great, too! Be more brave than me with colors on this! Spring is all about bright and new things!

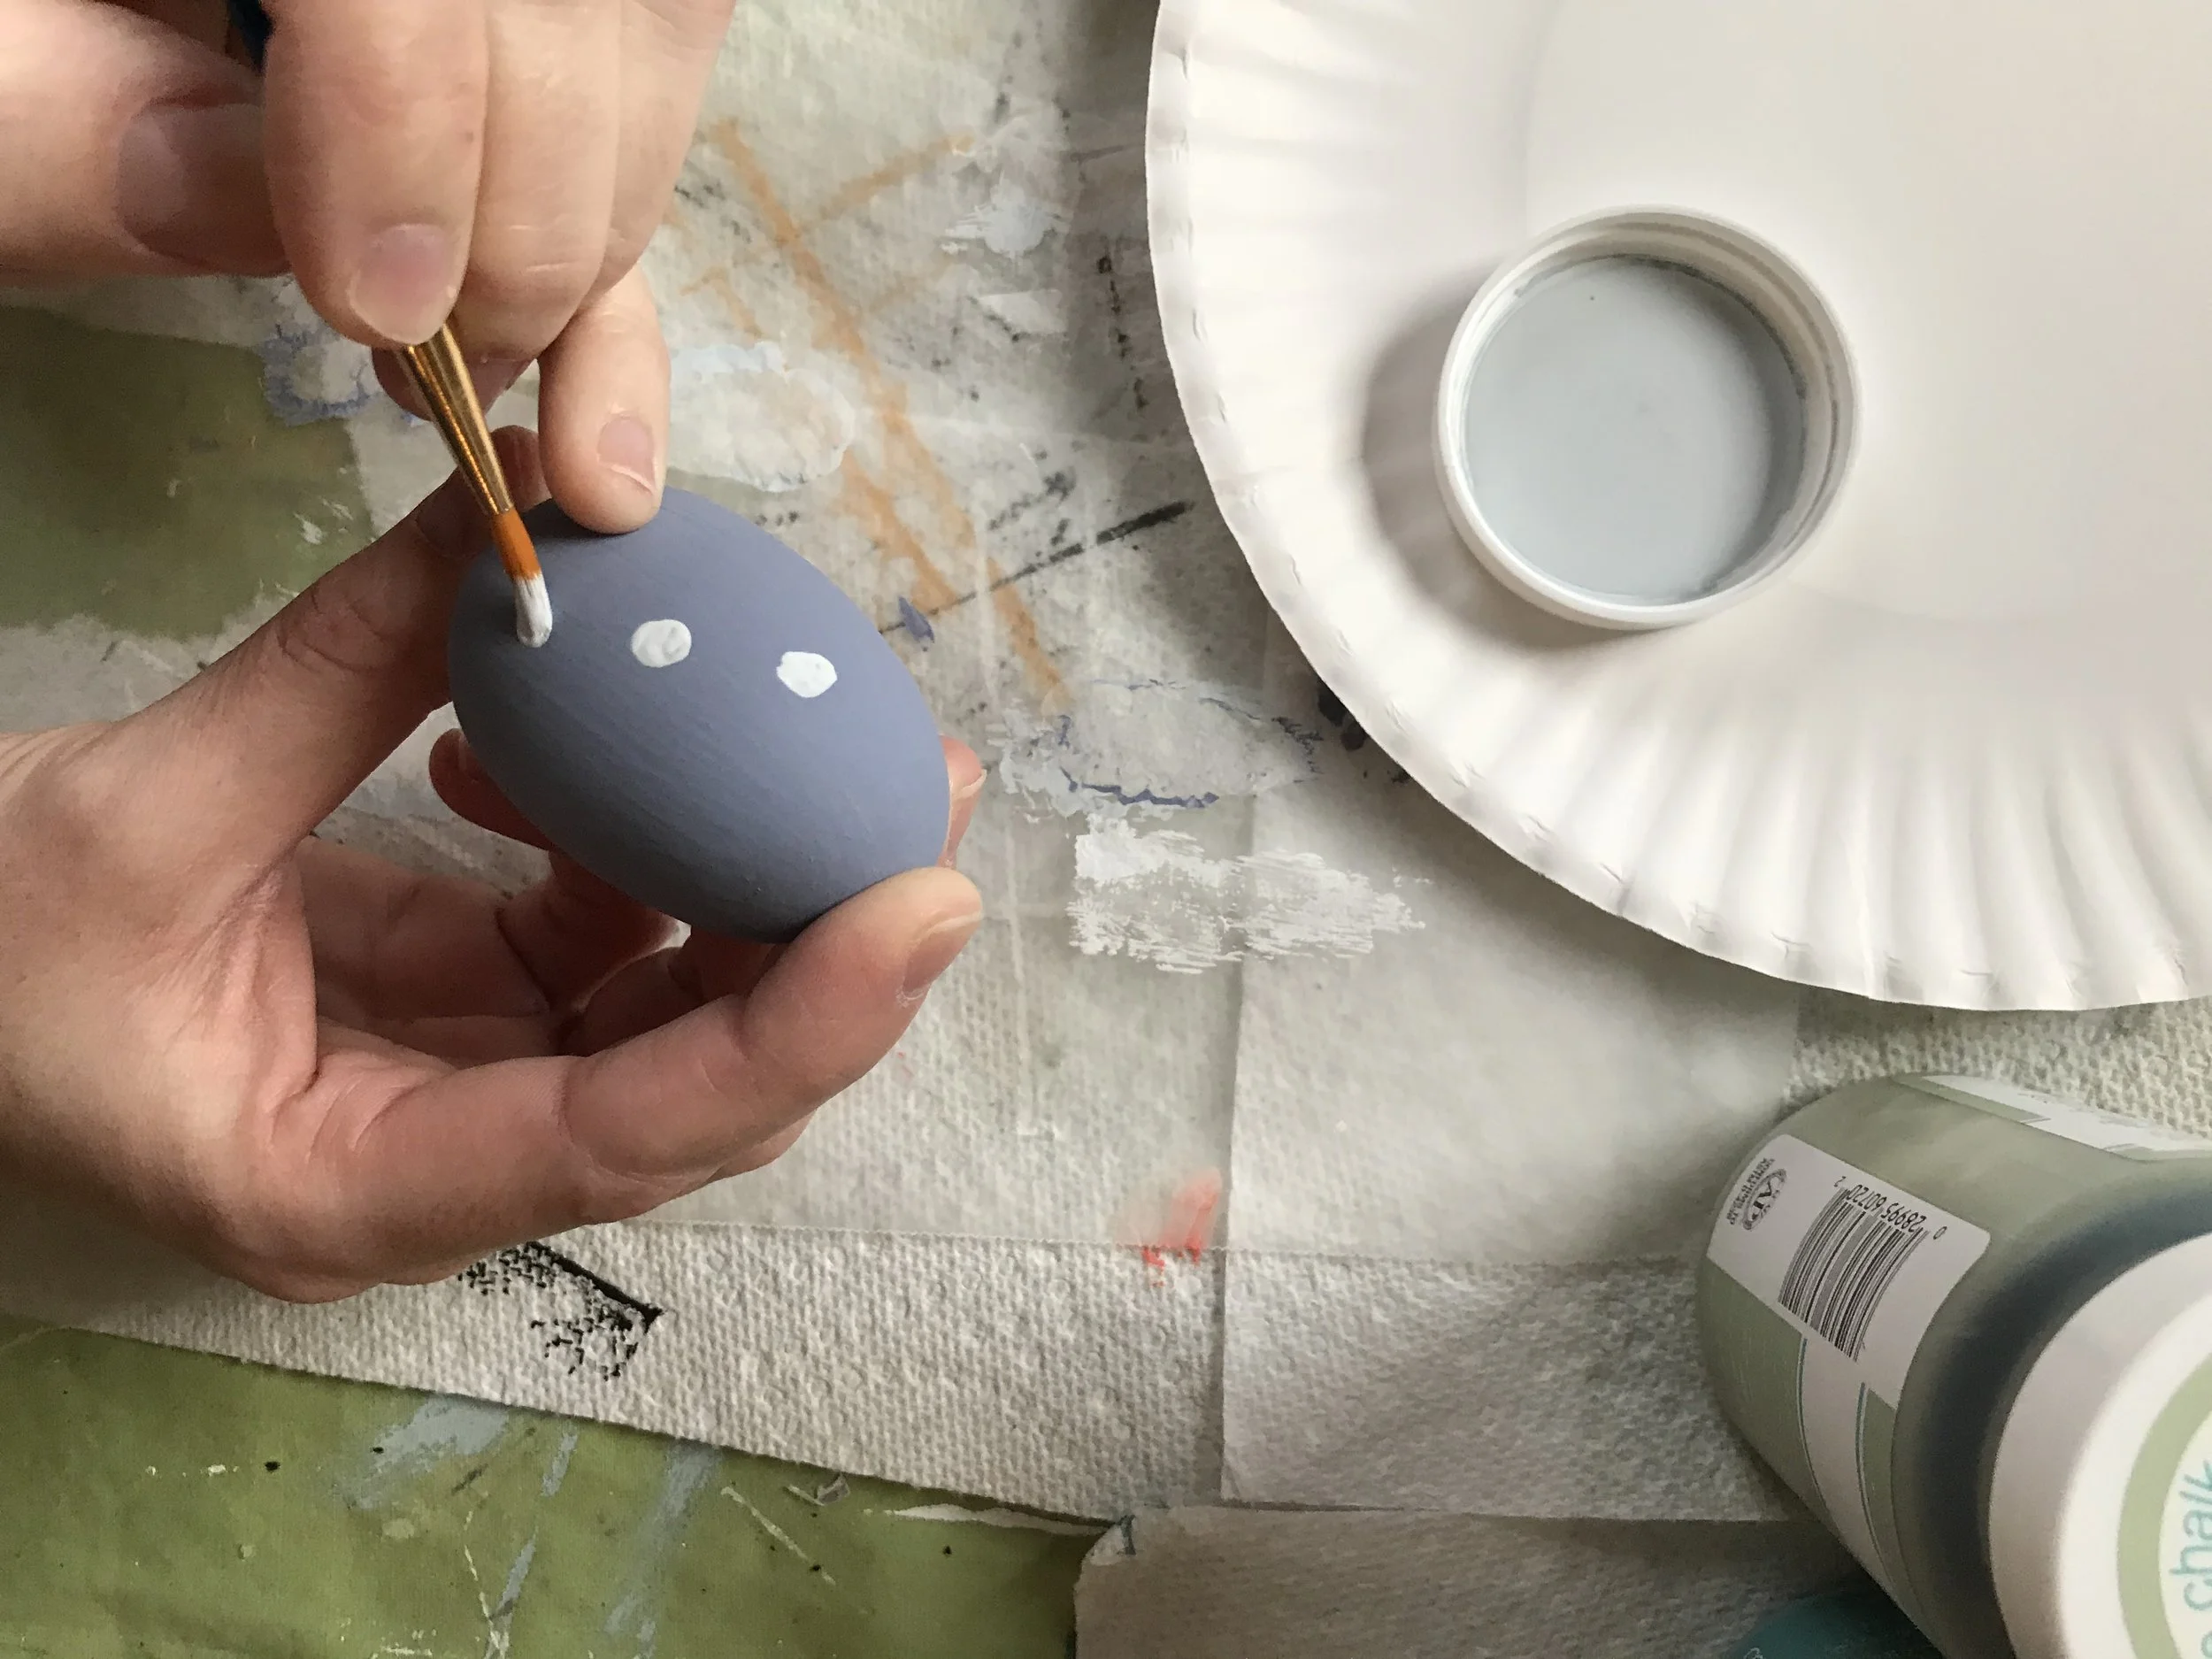
THE BRUSH I just use cheapy brushes and as you can see below, I use paper plates...nothing fancy here! The brush does matter for some projects, but for this one I knew I'd be distressing later so I just grabbed the first brush I saw. For the painted details like polka dots and stripes you'll need smaller brushes.


I used wax paper to let them dry on. (Laying them on the paper towel would have given a nice pattern, but it would've dried to the egg, too. You could always sand that part off!) The good thing about chalk and acrylic is that it dries fast - 15 min or less! Try to give them even, but not too heavy on the paint so they will dry enough for you to add designs next.
Once your base coats are dry, you are ready to get creative! The options are endless with strips, polka dots, chevron, flowers etc. Here is where the small brush comes into play! Oh and here's a tip for painting with a small brush: turn your paint upside down before opening, then just use the paint in the cap! This avoids over dipping and overloading your brush.
I tried to get fancy with my egg designs, but since I was trying to hurry during nap time I should have just stuck to what I am good at...simple things. My favorite pattern turned out to be the white egg with the three dot pattern and the green chevron arrows. How would you decorate your eggs? Leave your comments below with colors and pattern ideas for everyone else!
We aren't done yet! Keep reading...

If you're sure you are done with painting, just let them sit to dry completely.
If you are going to distress your eggs then go grab your piece of sandpaper. You won't need a big piece, just cut a piece the size the palm of your hand or smaller. (NOTE: This is going to create some dust, try doing this outside or at least somewhere you can clean up easily.) It's time to take out any lingering stress you have on your pretty, painted eggs!
There's really no rhyme or reason to this part! If you are a distressing newbie, just scratch the surface of the egg with the rough side of the sandpaper. No need for a pattern for this project, just swipe all different directions until you get the look you want. Now, if you want a really chippy look you could use an electric palm sander. I tried this at first, but stopped because it wasn't the easiest thing to do since the eggs are rounded and not the easiest to hold on to.

THE FINISH Once are you happy with the way your eggs look, wipe off the dust from sanding with the damp paper towel or rag. Making sure they are dry, the next and final thing you should do is protect all that hard work! Normally, I use a brush on varnish to protect our painted finishes. However, for this project I suggest a polyacrylic spray. It'just a lot easier to spray the eggs than it is to hold them and brush on a clear coat finish. (You probably figured this out when painting the base coat!) With spraying, you also get a more even coat and less streaks.
That's it! Let them dry then they are all yours to use! To style them, I just filled a cute wire basket with fake moss and tossed the eggs on top! Super simple! They'd look cute in a wooden bowl or on a cakes stand with some greenery. You could even use them as part of your tablescape for Easter dinner. So many options! The best part is you can use them year after year. Oh yeah and you made them yourself...that's pretty cool!
Happy Easter, sweet friends and Happy Egg Decorating!